You may be aware that Sage Intelligence allows you to connect to any ODBC compliance data source, meaning that you can access and report on information from just about anywhere in your organisation. Included is the ability to use Microsoft Excel as a data source, which is useful in cases where your business management or accounting solution doesn’t allow you to capture specific information you need to keep track of.
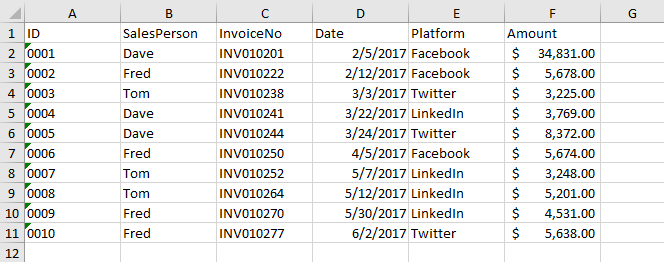
As an example, in my business, a number of my sales are initiated through Social Media and I want to keep a record of this. Although I could probably capture this in a comment field in my accounting system, I have chosen to use Excel. An instance of the information is shown below and in this tip, I’m going to show you how you can pull the information into Sage Intelligence.
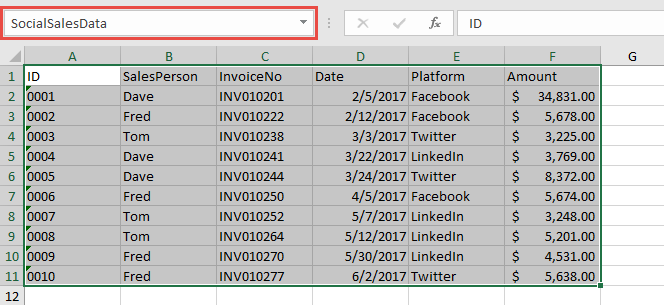
The first step to using Excel as a data source is preparing the workbook by creating a named range of the data you want to report on. To do this:
1. Select the data you want to include. Take note that it needs to be formatted as a normal data range with column headings.
2. Then in the cell reference field, enter a name to represent (refer to) the information and press enter. I’m going to call mine ‘SocialSalesData’.
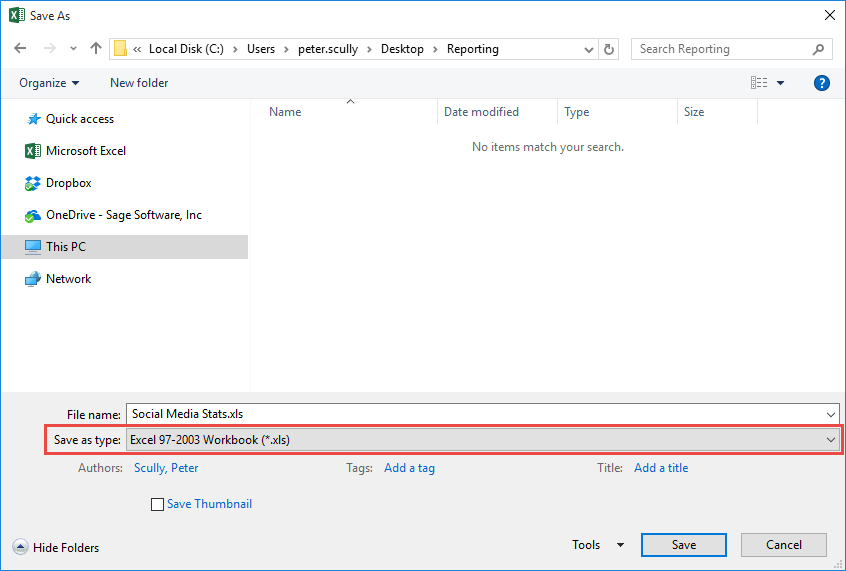
3. Next, save the workbook, but be sure to set the save as type to Excel 97-2003 Workbook / .xls.
The workbook is now set up and you can connect to the information in it using the Sage Intelligence Connector module.
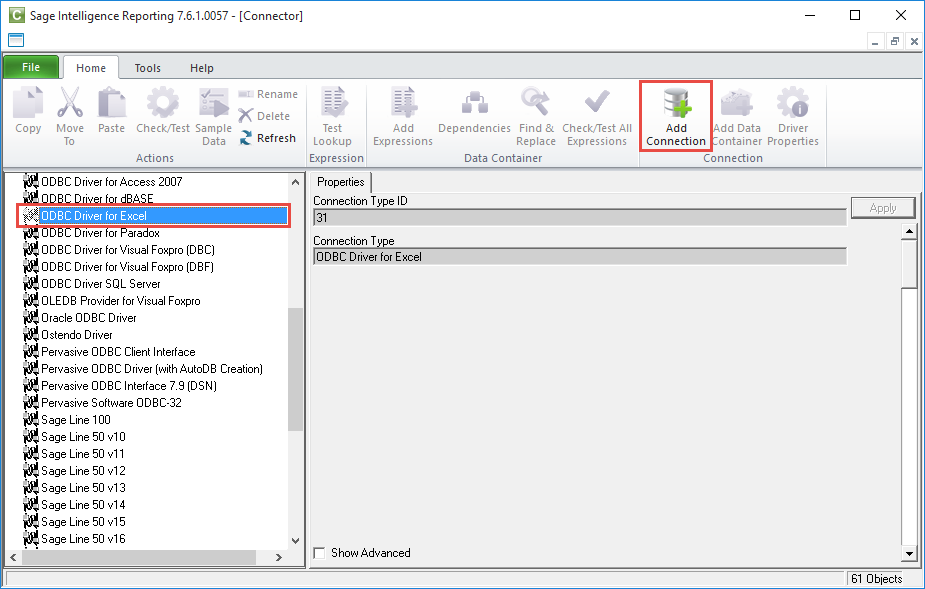
1. In the Connector, locate the ODBC Driver for Excel connection type.
2. Select it and then click Add Connection on the Home tab on the menu ribbon.
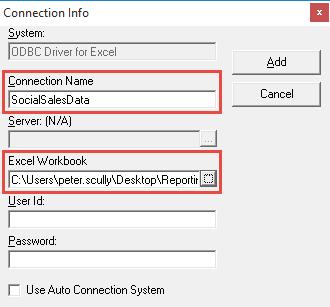
3. In the Connection Info dialogue, give your connection a name.
4. Under the Excel Workbook field, navigate to your Excel file that you saved.
5. Click Add.
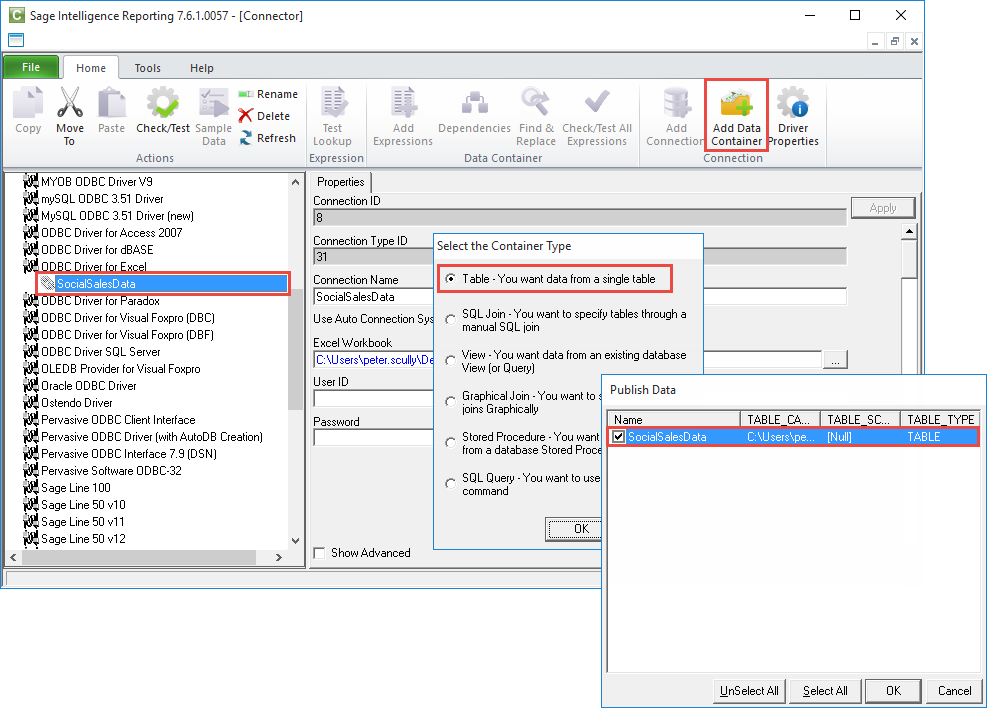
6. Your connection will be shown under the connection type. Add a container to it by selecting it and clicking Add Container on the Home tab.
7. From the Container Type dialogue, select Table and click OK.
8. Then, under the Publish Data dialogue, you’ll see the named range you defined in your workbook brought through as a table. Select it and click OK.
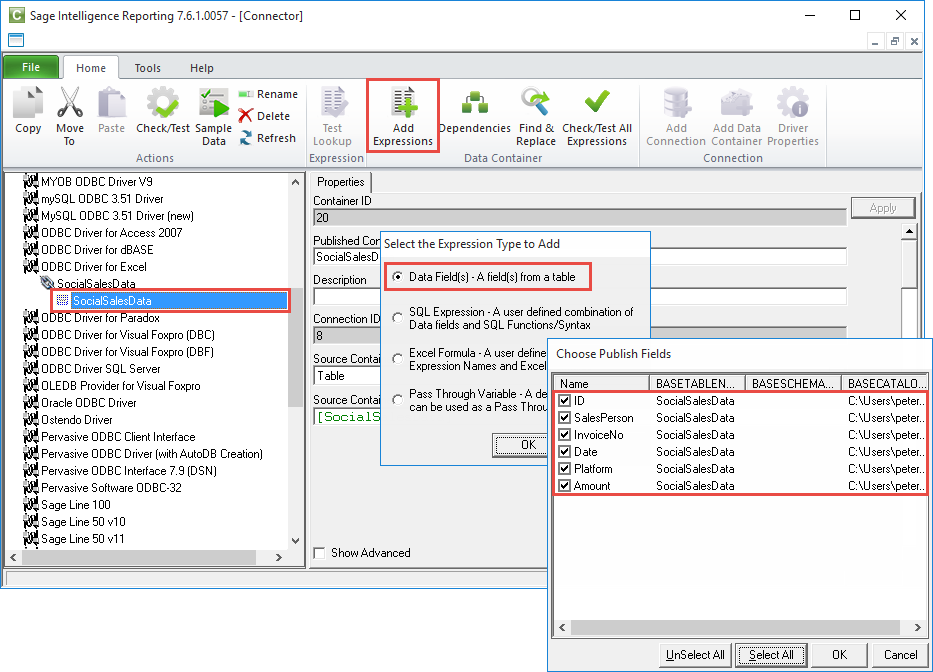
9. Your container will be added under the connection, and the last thing to do is add your expressions by selecting the container and clicking Add Expressions on the Home tab.
10. From the Expression Type dialogue, select Data Field(s) and click OK. Then, under the Publish Fields dialogue, you’ll see all the fields that were present in your workbook. Select the ones you want to include in your container and click OK.
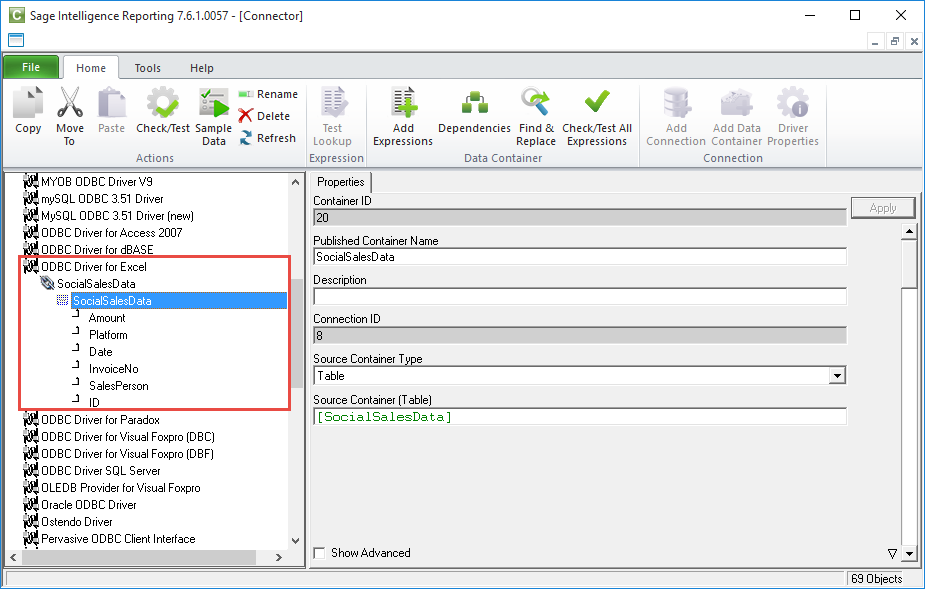
Your container is now complete, and you can make use of it in the Report Manager like you would any other container. Once you have defined a report from it, instead of just using it on its own, you could combine it with your sales report for example, through the use of a Union Report.
If you would like more information of connecting to different data sources through the Sage Intelligence Connector module, then take a look at the following webcast:
