Sage Intelligence allows you to report on data from different companies in a single report to obtain a holistic view of your organization and allow you to carry out more detailed comparative analysis. The primary way to do this is through a Consolidation Report that uses a Consolidation Connection. Once a Consolidation Connection has been created, there are several ways that a Consolidation Report can be produced from it.
Consolidation Connections are created in the Connector module, and in this tip, I’m going to show you how to add your own. Depending on your Sage accounting product, a Consolidated Connection is provided as standard, however, if yours does not have a one, it’s a simple process to create one. You may also wish to add one as a way of organising your containers, for example, giving any custom Consolidation Containers you create their own connection.
To add one, do the following:
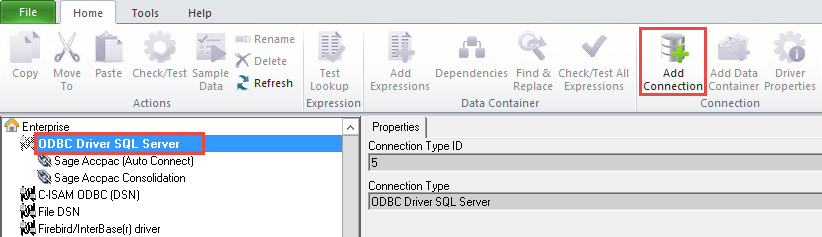
- With the Connector open, select the Connection Type associated with your Sage Accounting Database.
- Select Add Connection on the Home tab on the ribbon.
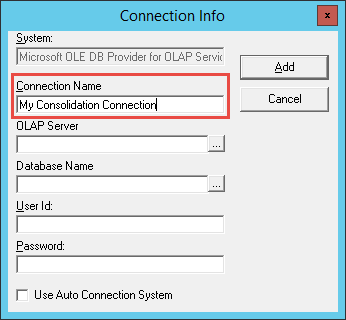
- A dialog will appear where you can enter the details for your connection. Give your connection a name and click Add. Do not worry about entering any of the other details.
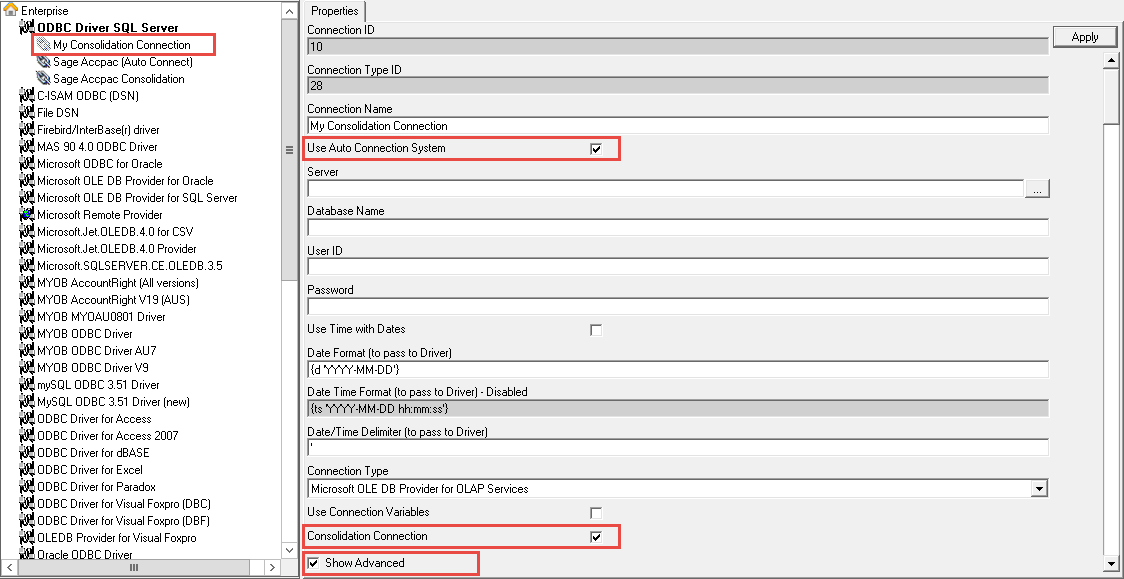
- The new connection will be added under the specified Connection Type.
- You now need to set the right connection properties for it to allow it to consolidate data. For this, go ahead and select it in the object window to display its properties.
- First, ensure that Show Advanced is checked to view the advanced options.
- Now check Use Auto Connection System as well as Consolidation Connection and click apply.
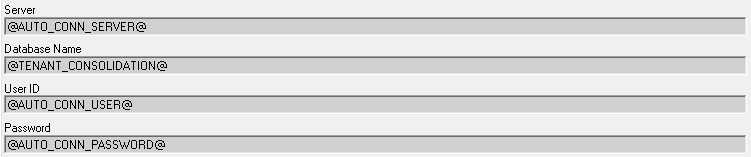
The Server, Database Name, User ID and Password fields will now be populated with system variables containing the relevant information to connect to your Sage Accounting database and extract information from multiple companies.
The connection is now complete and can be used to create a Consolidation Report. There are a number of ways to do this and in our next tip we will share more on this. So, stay tuned!
